Original game date: December 15, 2018
Having cleared the ground floor of the keep, the party retreated back outside to take a long rest before exploring the upper floor and towers. While they rest, lightning strikes the keep and the front doors slam shut, the lightning trap re-setting.
A Druidic Interlude
Tovull speaks with Saul, commending him on his efforts thus far. He believes that Saul will indeed prove worthy. He presents Saul with a gemstone that soon grows hot to the touch and damages Saul’s hand. Tovull explains that with practice and meditation he will be able to bring the elements locked within the stone into balance and then be able to hold the stone without injury. This is the first task he must master before he might join the Circle of Elemental Shepherds.
Once More into the Breach
The party re-enters the keep and explores the upper levels.
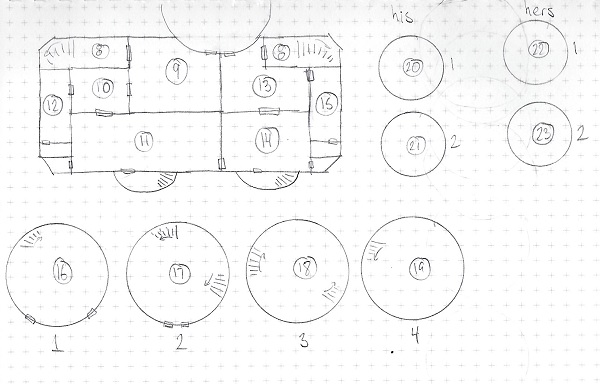
8. Upper Hall
A Will-o’-wisp is posted here.
9. The King’s Antechamber
More expensive furniture, but just as aged and crumbled as the rest. The doorway to the Storm Tower is destroyed and full of rubble.
10. King’s Study
Spartan chamber never really used by Wodugog except as a pass through to his private bedchamber. Torn and faded tapestries of orcs (though of elven hand) hang on the walls.
The tapestries attack, trying to engulf and suffocate. Rug of Smothering.
11. King’s Bedchamber
Dominated by a large bed, badly deteriorated. The room has been rifled through. A hidden compartment near the exit to the King’s Tower holds three Elemental Gems (air, water, fire).
12. Servant’s Quarters
Beds are deteriorated, as are the chests. A total of 30gp can be collected hidden away in various nooks and crannies. The room is home to four Spectres of Wodugog’s devoted servants.
13. The Lady’s Antechamber
Aged and crumbled furniture in a feminine style. The doorway to the Storm Tower is destroyed and full of rubble.
14. The Lady’s Bedchamber
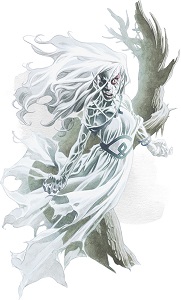
Intended for the elf princess Asturia, though she never lived there but was imprisoned in the tower. Haunted by 6 Spectres (the lady’s handmaidens). Heavy door to the tower is barred and locked, but the Banshee passes right through and pleads for the spectres to be left alone.
Please, they loved me in life and know not what they do. Please, I beg you. Let them be.
She is initially kind, explains that she was kidnapped by a giant and presented as a gift to a foul orc. Grows increasingly unhinged until she wails. The spectres from the Servant’s Quarters come to her call if they have not been dealt with.
15. Servant’s Quarters
Broken beds and simple furnishings. An elven broach (value of 100gp) can be recovered. 3 Spectres.
16. Storm Tower Level 1 – The Storm Giant’s Prison
To get there must either slide down the poll (DC 16 Acrobatics check) or climb down (DC 14 Athletics check, 3 times). The poll is 65 feet long total.
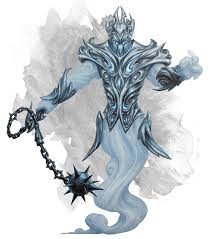
The prison lies behind the audience chamber and forms the first floor of the Storm Tower. A large skeletal figure hangs chained to a strange aparatus, and stirs at their entrance, a ghostly presence manifesting (see Revelations of Tormyr below).
17. Storm Tower Level 2
Barracks. Broken beds and chests. 50gp.
18. Storm Tower Level 3
Private chamber of the former Cleric of Gruumsh, Kored, who advised Wodugog and served him loyally. He remains as a wraith.
The fallen body of a Paladin of Lathander lies in the room and is animated by Kored as a Helmed Horror.
The paladin was a member of The Redcrest Five. He carries a +1 Longsword, +1 Shield.
Hidden in the chamber, flung into a corner is a Ring of Wings (3 charges, 2 to cast Fly, 1 to cast Feather Fall). Regains 1d3 charges at dawn.
19. Storm Tower Level 4
Retractable roof to open it to the sky (large lever off to side), it also raises a lightning rod up from the ground. Shrine to Gruumsh and tomb of Wodugog. The body of a shattered gnome lies flung against a wall, the last of The Redcrest Five to die. Only the thief survived, barely, after prying one of the gems from the armor, which they could not carry.
The sarcophagus lies open on its side, the Wodugog’s Breastplate (Belt of Storm King) lies on the ground. An obvious epicenter of an explosion that shattered several urns in the room.
Final battle against Wodugog, who opens roof and calls down lightning.
Secret door around the lightning rod (embedded in wall), which can be climbed down into the secret first floor room of the tower and the room where the Storm Giant Prince was imprisoned.
20. King’s Tower
The bottom floor was where Wodugog trained. There is a well-made oak weapon’s rack that has survived, though it lies empty, as does an armor stand.
A dead body lies at the bottom of the stairs, its hands crossed over its chest. This was a ranger, his armor badly burned. His bow lies near him, and a quiver though all but three +2 Arrows remain. He carries 10gp. He bears a talisman with the emblem of his adventuring group (The Redcrest Five), engraved on the back with a cardinal in flight.
21. Private Chapel
The stairs are trapped (third from the top) that electrifies the stairs (6d6 electric damage, CON save DC 14 for half damage).
A place for Wodugog to kneel before the storm. Protected by an Air Elemental Myrmidon (Mordenkainens’ Tome of Foes, p.202).
22. Lady’s Tower
Served as her bedchamber while imprisoned. An old harp. Windows covered in metal bars. Jewelry worth 800gp can be recovered. Swan Boat Token.
23. Lady’s Tower
Private library, with many old weathered books. Windows covered in metal bars.
Revelations of Tormyr
At the end of the Empire of Ostoria, when the smallfolk rose up and swarmed like termites, destroying the foundations of all that the Storm Giants ruled, hard choices had to be made; new unthinkable alliances forged. Hekaton the Great saw in Wodugog a kindred spirit of the storm, and a deal was struck. Wodugog demanded that Hekaton deliver to him an elf princess that he coveted, Asturia, and that this castle be constructed on the ruins of The Tempest’s Eye, the giant stronghold that once stood here, crafted from its stone. In exchange, Wodugog had to give up one of the Heimskring Stones (ancient gemstones of great elemental power) that had been forged into his Belt of the Storm King.
Wodugog gave up the stone reluctantly and plotted to gain more leverage with the Great King. He poisoned and imprisoned his son, Prince Tormyr after he had delivered Asturia, in chains that drew upon the giant’s strength to magically fortify the castle.
And though he did not know it at the time, Tormyr’s father must have offered him as a hostage as no one came to attempt a rescue. Or perhaps there just wasn’t enough time. Not long after the treaty, Annam Allfather shattered the Ordning in his wrath at the loss of Ostoria and Hekaton may have had other priorities than retrieving his least favored son.
Wodugog gave up the stone reluctantly and plotted to gain more leverage with the Great King. He imprisoned me after I had delivered Asturia, in chains forged by Kored, his priest, that drew upon my giant’s strength to magically fortify the castle. And thus have I remained, for centuries upon centuries.
When Wodugog finally met is deserved tragic end, he and his followers’ spirits were likewise bound to the keep. The castle was thus eternally protected by Wudogog’s fallen minions until one day an adventuring group penetrated deep in the castle and one of them, a young male dwarf rogue, made off with another of the stones. This awoke Wodugog’s full wrath and he pulled all those he’d valued in life back with him, not even his tragic wife was spared, torn from her afterlife. So long as the device to which Tormyr is bound remains active, the castle will be fortified and the spirits (including Wodugog) will return.
Grellosh opts to release Tormyr and destroy the evil device that has drained his life force despite the eventual damage that will slowly erode the keep he claims as his own.