Original game date: November 23, 2019
The game resumes with Fortune’s Irregulars still in the midst of the Tomb of Horrors. They have fallen back to the strange dark chapel they previously explored to take a long rest and recuperate.
Chatting in the Chapel
On watch, Vorai and Aesar chat, with Vorai sharing his thoughts about remaining in his present female form as a way to break with his past. He comes clean that he has joined the Zhentarim, but only as a way to infiltrate the organization to seek vengeance against the man who wronged him greatly (and made him a tiefling). He shows Aesar his Zhentarim mark, and tells him of Xylon. Vorai feels that his travels with Fortune’s Irregulars have changed him, and opened up new options. He is impatient at the thought of a long infiltration of the Black Network and what that might require of him. He’s long resented The Harpers, but perhaps they may be of interest… He is curious to hear Aesar’s opinion.
Aesar doesn’t think remaining female will be helpful so long as he remains a member of Fortune’s Irregulars. It will not be hard for people to figure out. He is not a Harper, but obviously after the events of the First Council of Baldur’s Gate, and his time in Silverymoon, he’s met a few. He thinks the Irregulars have the promise to help with all of their issues and that they are a formidable force. Vorai is glad, and says good, because heads need to start rolling.
Vorai goes back through the portal and returns to his original male form.
Back to the Dungeon Delve
The party makes their way back through the Mummification Chamber, and again crosses the spiked pit to return to the corridor they last explored. Saul easily spots a secret door, which reveals a small chamber beyond, and then a square room.
The Agitated Chamber
The room appears to be filled with funerary offerings and furniture. There are four rotting sofas, a couple of throne-like chairs, and a jumble of stands, small tables, and vases and urns that are dented, chipped, and broken. Only the rather plain tapestries hanging on the east and west walls appear to have been spared a rough looting. Amid the general havoc are scattered several trunks and a larger number of coffers.
Vorai and Aesar enter to have a look around, and Vorai slices through one of the two tapestries, which disintegrates into Green Slime. As he does so, the room suddenly begins to convulse and shake. Retreating, they are able to kill off the slime when Aesar uses the Wand of Winter to blast it with a Ray of Frost.
Saul steps up to burn away the other tapestry, which unfortunately causes it to transform into Brown Mold, that leaches the heat from the room. Behind this tapestry lies a door, which they are able to unlock and everyone soldiers through the brown mold, suffering cold damage along the way.
Crossed Corridors
A short corridor and stairs downwards brings the party to a crossed set of four corridors, each one ending in a door.
The door at the end of the southern corridor is revealed to be yet another false door, trapped to launch a spear at anyone who opens it. The trap is detected and disabled and the party moves on to the north, Saul taking the spear with him. Immediately beyond this door, Saul detects a secret trapdoor to the immediate left. This trapdoor opens onto a steep flight of narrow stairs that spiral down to a 5-foot-wide tunnel.
The party follows this tunnel, which emerges into a corridor that then heads east. The door at the end is a great block of adamantine. It has permanent antimagic effects, revealed when Ander attempts a Knock spell. There are three slots in the door at about waist height.
Unable to figure out how to open the door, the party decides to backtrack and see if perhaps they have missed finding a key along the way. Returning to the north corridor, they follow it further, passing through another door to a further 30-feet of corridor. Another door is found, and when the door is opened, sleep gas billows forth from the other side. Ander is knocked unconscious, and when Dawnstalker goes to get him, he too falls to the gas. As the party looks on, a massive boulder begins to roll down the hall towards them, the stone juggernaut threatening to crush all in its path. A quick-thinking Saul uses Stone Shape to narrow the passage and stall the stone. After a good 20 minute sleep, the effects wear off.
The party investigates what is beyond the corridor to the east. Beyond is a short corridor that turns right into a small alcove, with a circle mosaic tiled on the floor. The circle is divided into four quadrants, and each is a different colour – lime, cobalt, orange and pink.
The Gorgon Maze
Stepping onto the circle teleports Aesar into the northwest corner of a labyrinth, standing on a green circle. The rest of the party soon follows suit, with most of them by luck ending up in the same quadrant; Saul ends up in the northeast corner, and Dawnstalker in the southeast.
Working their way through the maze, they carefully avoid most traps, but a creature they can hear in the labyrinth keeps triggering a blast of small poisonous darts with a poison that saps their energy and quickly leads to exhaustion.
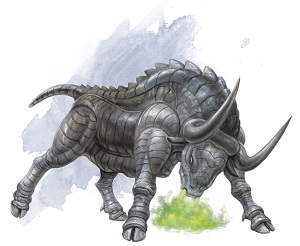
The creature is revealed to be a Gorgon, which breathes its noxious breath at the party as they near, very nearly pretrifying Vorai. But he recovers and lands the killing blow, driving his sword deep into its brain. Afterward, Saul successfully extracts some of the creature’s bile, which can be used in both poisons and cures.
The gorgon is revealed to have been the guardian of a golden key, which the party is able to pick up after disabling a trap.
The Pillared Throne Room
Returning to the Adamantine Door, the party puzzles over it for a while longer, after the golden key is no use. Saul reasons that the slots fit a blade like the tip of the spear he picked up from the door trap. Returning to the trap and grabbing two more spears they try inserting three spears into the slots at the same time, and a smaller door appears within the large adamantine door providing access to an immense chamber beyond.
The party looks upon an enormous chamber colored in pastels. A forest of massive, many-hued columns suport the ceiling.
The room features a number of intersting things to explore. On the south wall is large dais with a throne. On the north wall are two doors. In the southeast corner of the room are some charred remains, which the party investigates first. Within they find an orange gemstone, which they are wise enough to magically identify before anyone touches it. It is revealed to be a cursed item, which appears to offer wishes, but will only reward a twisted version of anything wished for.
Making their way over to investigate one of the two doors, Dawnstalker and Aesar come into contact with one of the pillars and they begin to levitate up to the ceiling and then to drift slowly over to the northwest corner of the room, where they see a telltale devil’s head with an inky black mouth that appears to be their destination. Employing his Rope of Climbing, Aesar is able to prevent he and Dawnstalker from coming into contact with the portal and are pulled back down to the ground.
The party distrusts the doors and leaves them unexplored, and later use stonecraft to obstruct and block them in case anything should try to enter the Pillared Throne Room from them.
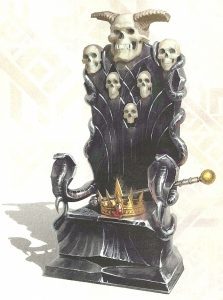
They turn at last to the dais and throne. Contrasting with the pastel colours of the floor and pillars of the hall is the stark blackness of the huge dais on the south wall, atop which sits an obsidian throne inlaid with silver and ivory skulls. Upon the throne rest a crown made of gold and a scepter made of electrum, with a gold knob on one end and a silver cap on the other.
Investigating the throne, the party discovers a small replica of the crown inlaid in silveron hte lower front panel of the seat.
Other party members having previously taken chances in the dungeon, Aesar determines that his turn has come and places the crown upon his head. He knows immediately that he is immune to the levitation effect of the pillars, and can see perfectly within the chamber. He is also unable to remove it.
Deciding that touching the gold end of the scepter to the gold crown is too obvious a solution, he instead touches the silver end (which radiates a faint necrotic energy) to the crown. He instantly dies, and begins to turn to ash. Only the quick actions of Vorai, who pulls out the Everlasting Rose and places it upon Aesar‘s crumbling body avoids disaster. The divine intervention of Sune, Goddess of Beauty, is enough to wrench Aesar back from oblivion and return him to life. For the experience, Aesar is left with a lasting Blessing of Sune (immunity to disease, and he will always age gracefully).
With some further experimentation, the party figures out that touching the gold end of the rod to the crown allows it to be removed, and pressing the silver end to the silver inlay on the chair causes the throne to sink down and reveal a 5-foot-wide passageway leading south.
The Wondrous Foyer
The narrow passage behind the throne leads to a 10-foot-wide landing and a series of steps which become wider as they ascend. The walls of the area are untarnished and gleaming copper panels set between rare woods inlad with ivory. The ceiling is silver, formed so as to reflect and amplify light brought into place. The chamber widens to the south, where a set of gently sloping steps leads upward. The six steps, from nearest to farthest, are made of onyx, pink marble, lapis, black marble, yellow serpentine and malachite. Upon the black marble step rests a cylindrical key of bronze. The key has an Antipathy spell upon it, which causes Saul to flee the foyer in fear.
The doors at the top of the stairs are 14 feet wide and 28 feet tall and made of gleaming mithral. Where the two valves meet, at waist height there is a cup-like depression, a hemispherical concavity with a central hole. The hole appears to fit the cylindrical bronze key, but the first key the party tries is the first golden key that they discovered in the dungeon, with Vorai making the attempt. He instantly disappears without a trace. In a moment of solidarity, Aesar grabs the key and turns it, disappearing as well and leaving the rest of Fortune’s Irregulars behind in shock.
The Denudement
First Vorai and then Aesar find themselves teleported back to the start of the dungeon, facing down the entrance hall. They are naked and they are not alone.
A click reveals that Vorai is staring down the lenght of a Thunder Cannon, held in the ebon hand of Vosz Draken. The familiar voice of Maximillian de Rigueur rings out from down the hall, Well now, this is an unexpected delight…